There is a suite of coffee brewers in the world, and they all work in slightly different ways. This means that they all have a number of slightly different pitfalls that might make them hard to work with, or simply just a little clunky.
Rather than running through some common flaws with these brewing methods, we’re going to speak about some of the small changes you could make that could have a big impact. For example, we’re not going to tell you to suddenly change the type of filter paper you’re using, but we might make a suggestion relative to some equipment you’ve already got.
The coffee world is large, and can get pricey – there’s no reason to rush into buying a complicated fix to a problem that you might not have.
French press

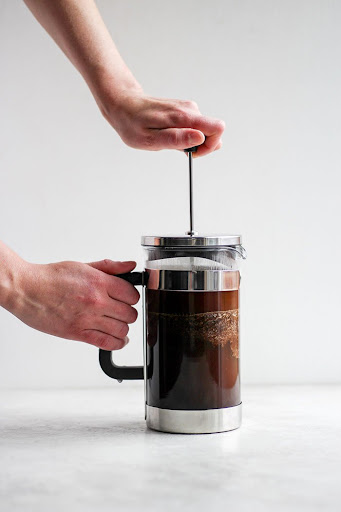
The fresh press is probably the most common way that coffee is brewed in the world. The reason for this is that the coffee is perfectly fine when you use great beans, and the brewers themselves are cheap. While you can certainly get expensive french presses, you can also buy cheap, functional ones from supermarkets and discount stores.
The simplest problem to solve when using your French press is the concept of thermal retention. Most brewing methods rely on adding hot water at the start of the brew, leaving it for a while, and then pressing and pouring.
We would suggest a different method – add hot water incrementally so that you can ensure the coffee brewing mixture retains a slightly higher level of heat over time. This will lead to greater extraction, as hotter water will dissolve flavor compounds more easily.
Start by boiling around 500g of water, for which you’d need around 30g of ground coffee. Add the coffee to the french press, followed by enough water to cover the grounds. Allow for thirty seconds of brew, before stirring the mixture, and top the water up to 250g total water weight. Then, wait for two minutes, before breaking the coffee crust that forms, stirring the mixture once or twice, and then adding the remainder of your water. Allow that to sit for another two minutes, break the crust and stir twice, and then plunge, and pour.
You’ll likely experience a much more intense flavor since the coffee will have had longer to brew in this immersion method. Only you know whether or not you liked it, but it’s certainly an interesting experiment.
Aeropress

The Aeropress is perhaps the most common and popular piece of specialty coffee brewing equipment. The reason for this is really quite simple, we would argue – it’s cheap, dependable, and makes great coffee!
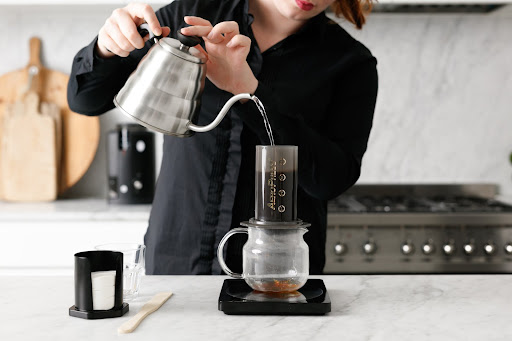
The general consensus of the way that Aeropress coffee is brewed is remarkably simple – an Aeropress is opened all the way and inverted on the countertop or the campsite. Grounds are added to the Aeropress, followed by hot water and a period of immersion brewing. Stir the coffee a few times, before capping the liquid with the filter piece of the Aeropress, and press the coffee out into your mug.
We’re going to suggest that you swap around the piece of that brewing time frame you spend the most time on. This might sound a little odd, but we’ve seen some truly great results from it!
To an inverted Aeropress, add coffee and water, as normal. Allow the coffee to have a form of immersion brew while it’s inverted, and then stir the mixture once or twice to disperse the coffee, and cap the brewer before inverting.
Press the coffee exceptionally slowly, now. We have seen some brewing recipes take as long as two minutes to press the coffee out of the brewer. While that might feel like a very long time, it can yield fascinating results!
In that tiny inner chamber, you’re essentially creating an immersion brew that’s under a small amount of pressure. It functions, in a very obscure way, as though it were an espresso machine pressing coffee through the puck, which also had a vertical pre-infusion chamber.
This pressure in the liquid is, by the nature of the physics of pressure, everywhere throughout the liquid. Pressure is being exerted between the coffee and the water, leading to greater flavor extraction over time.
If you’re a die-hard Aeropress fan, then we would certainly recommend giving this method a go! It’s not that different from the way that you already brew your coffee, and it can allow for some interesting results. Personally, we’ve certainly seen darker, richer brews thanks to the increased extraction.
Espresso machine

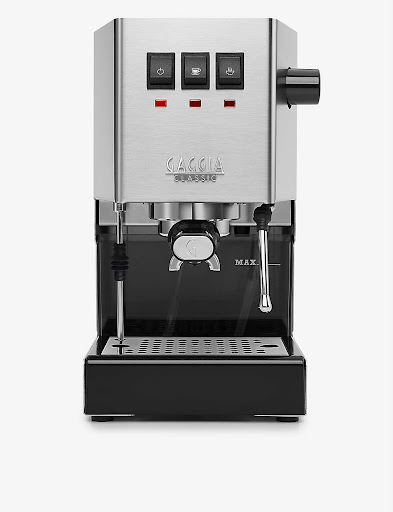
If you’re lucky enough to have an espresso machine in your home, then you’re likely aware of the many complex things that make an espresso machine both wonderful to own and tricky to use. Something that often gets overlooked during the process of espresso making, we would argue, is coffee distribution throughout the puck.
This is exceptionally nerdy, but it does make a noticeable difference to the coffee that you produce.
Recently, you may have seen distribution tools floating about on social media – they look like miniature versions of a wide-head massager: a small handle with wires poking out in straight lines. This tool serves to disrupt the bed of coffee within a portafilter, collapsing small air pockets that may form during dosing, and allowing you to redistribute the coffee within your basket.
From that more evenly distributed coffee bed, you can tamp coffee down, ensuring that there is little to no negative space within the bed itself. This leads to a brilliantly distributed coffee bed, which, in turn, leads to a more evenly extracted brew. In other words, you’re getting more coffee flavor out of the same volume of coffee.
Of course, you don’t need to buy one of those unique little distribution tools – you could use a pin, a fork, or anything with small points. The end result will be the same – well-distributed coffee in your espresso machine.
Conclusion
We hope that this article has given you a few ideas of easy ways that you can brew better coffee in your home. We’re thankful that we’ve avoided trying to offer you a magical, cure-all product that would change your life: sometimes a simple change can make a fascinating difference.

